
Running a group: from collecting attendance to creating the draw
If you meet with the same members again and again, such as a weekly practice or a monthly tournament, a group is handy. You collect attendance, then create the draw with only the people who are attending. You need to log in to use groups. Read through the "Create, invite, approve" sections first, then open only the sections you need.
A group collects attendance and then creates the draw from it
- Create a group: The person who creates it becomes the "Organizer," the person who runs the group.
- Invite members: Send an invite link. The people who receive it apply to join.
- Approve requests: The organizer, or a "Co-organizer" who helps the organizer, approves them.
- Create an event: Make one for each practice day.
- Collect attendance: Members enter their own. Visitors (people who are not members and join only that day) can be added by the organizer.
- Create the draw: Build the draw from the people marked "Attending."
You get to groups through the "Groups" menu that appears at the bottom of the screen while you are logged in.
Create a group by choosing a name and an approval method
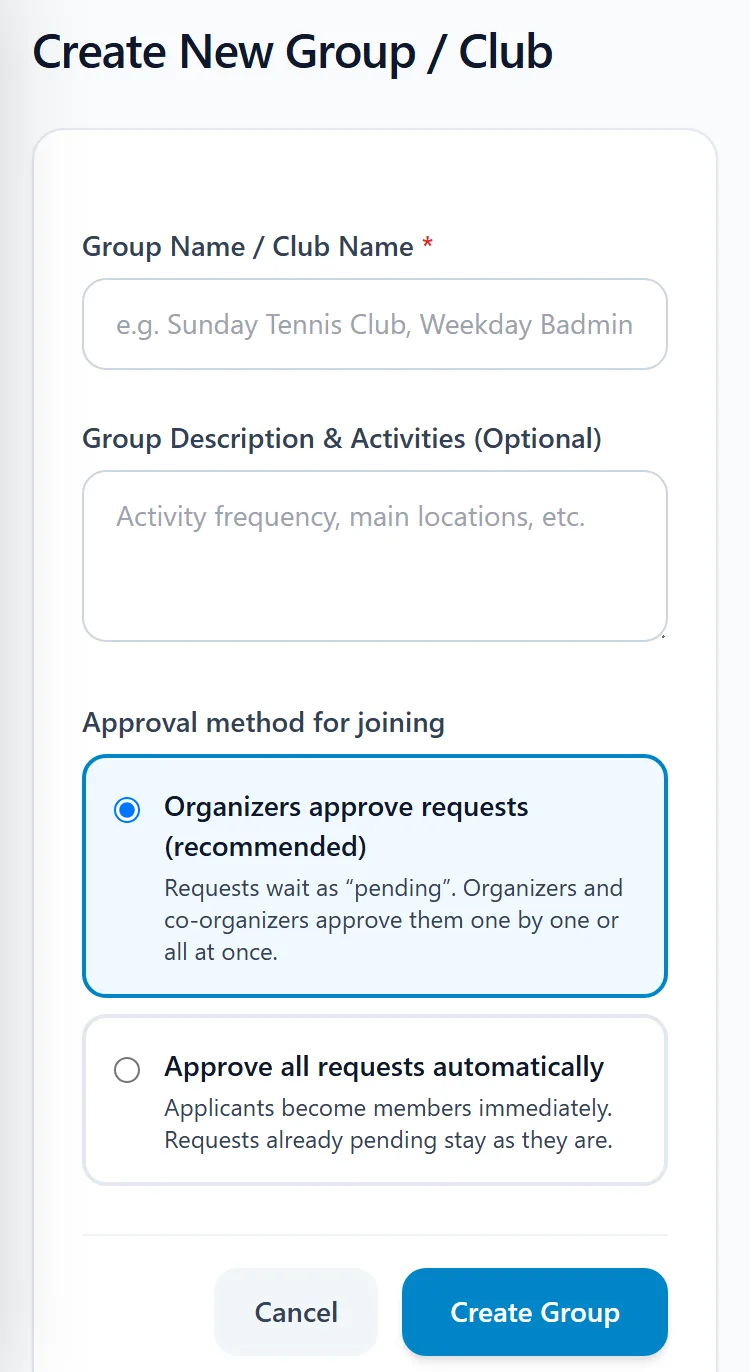
- Open "Groups" in the bottom menu and tap "Create New Group."
- Enter the group name. The description is optional.
- Choose the approval method (who approves requests to join). If this is your first time, we recommend "Organizers approve requests."
- Tap "Create Group."
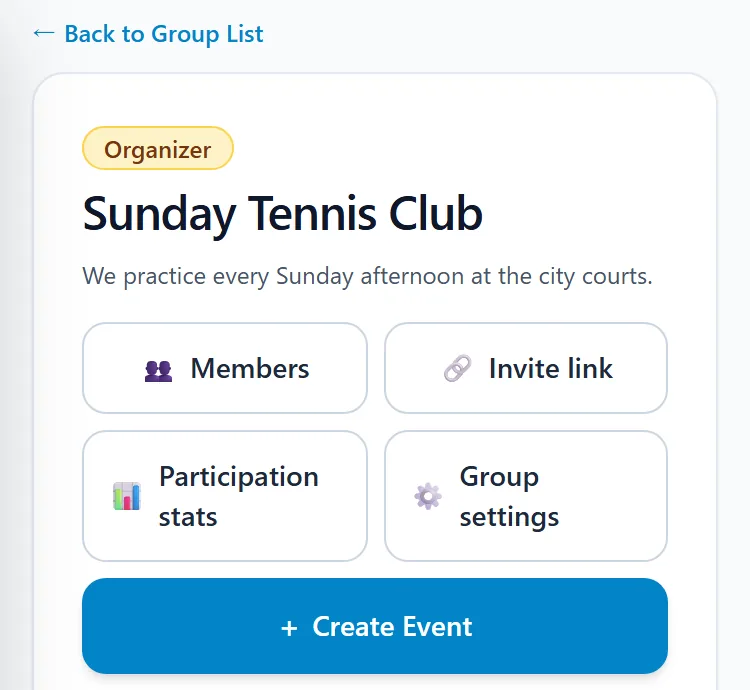
After you create it, the group screen opens. From here you can go to the members, the invite link, participation stats, group settings, and event creation. The buttons are arranged two to a row.
Gather members by sending the invite link
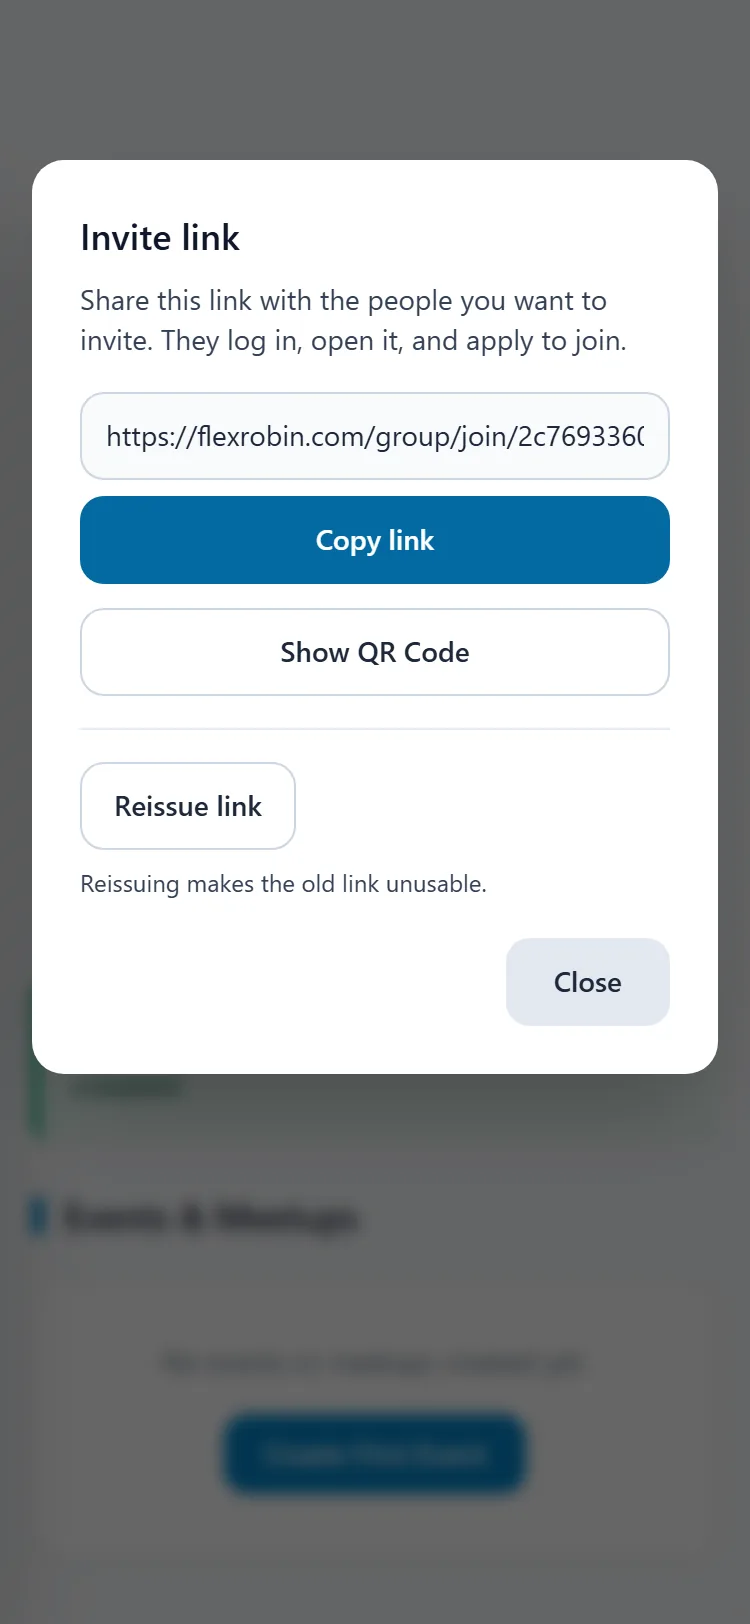
- Tap "Invite link" on the group screen. "Invite" on the members screen opens the same screen.
- If you have not issued a link yet, tap "Create invite link." The link appears without reloading the screen.
- Tap "Copy link" and send it to your members by chat or similar. If you want to show it on the spot, tap "Show QR Code."
Only the organizer and co-organizers can open the invite link screen. The link does not expire. "Group settings" also has a field for the same invite link.
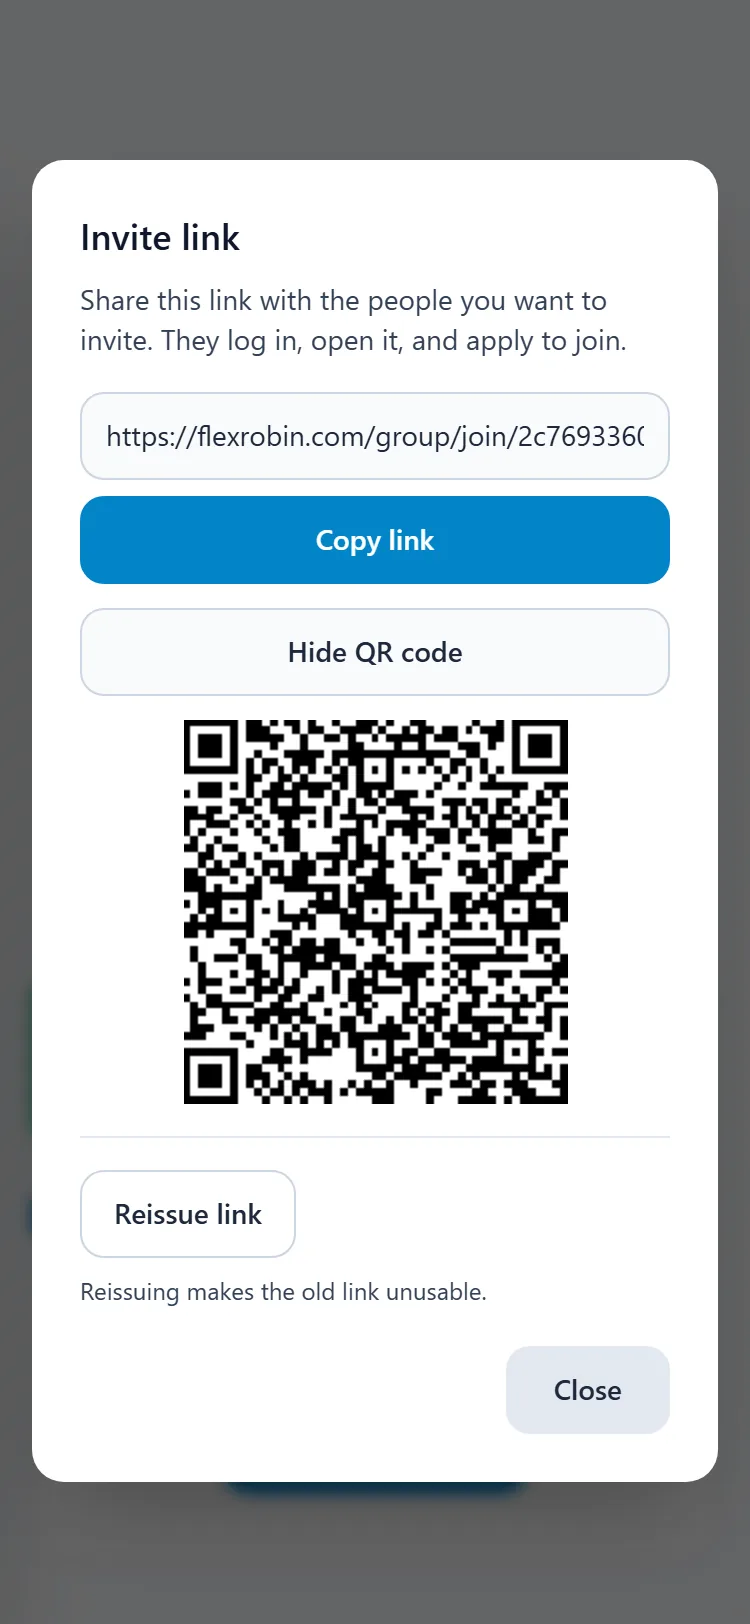
A person who receives the link logs in, opens the link, and taps "Apply to join."
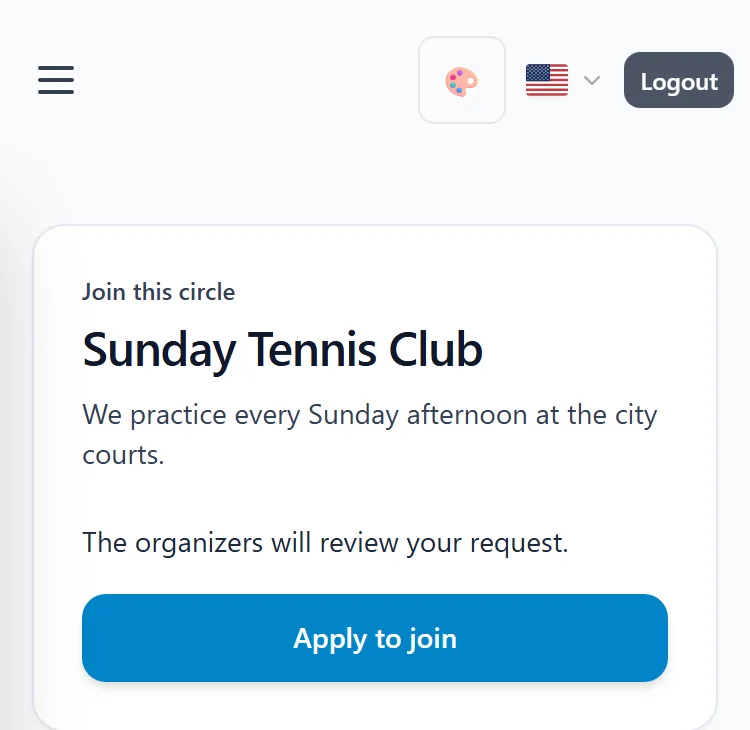
If you tap "Reissue link" (a confirmation appears), the old link stops working and a new link appears. Use this if the link has spread to people who have nothing to do with the group.
When a request arrives, an organizer or co-organizer approves it on the members screen
If the approval method is "Organizers approve requests," a request is "Waiting for approval." The group screen shows the number waiting for approval. Tap the button to review them and open the members screen.
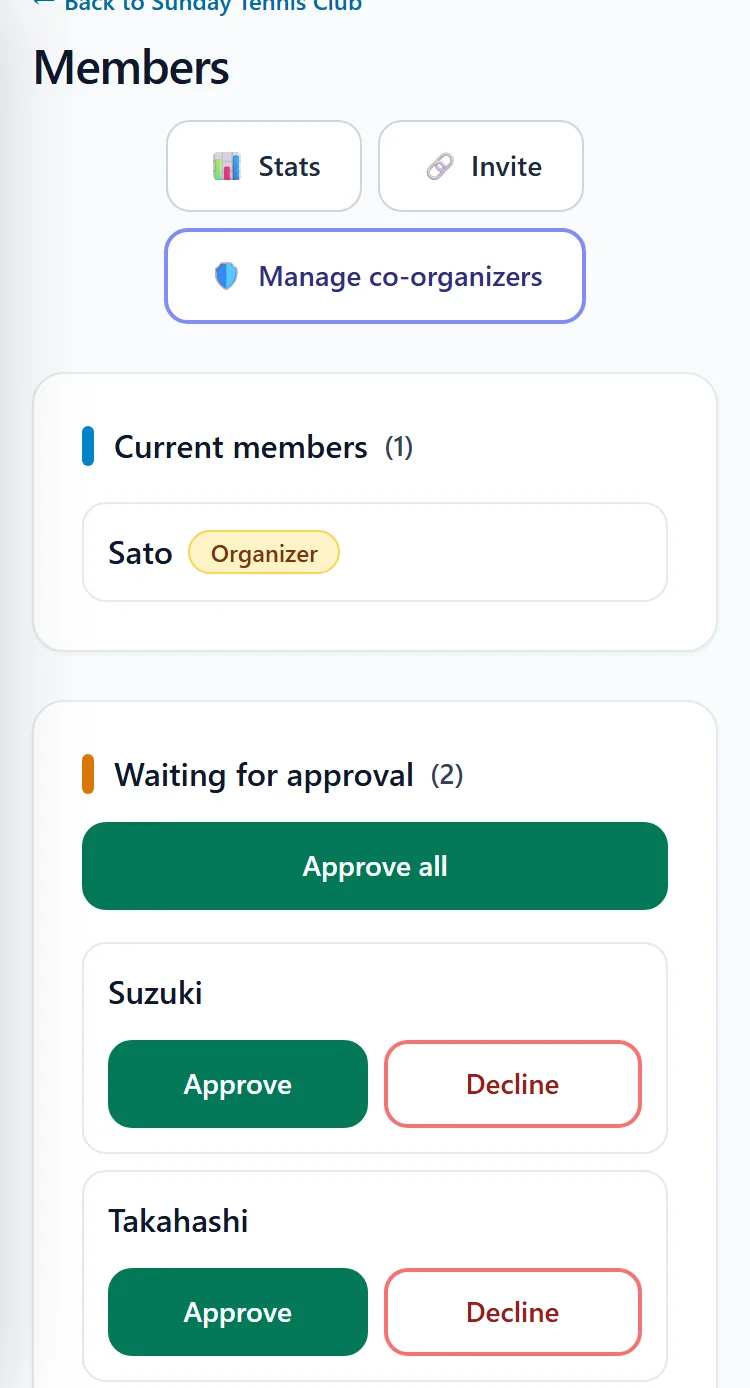
- Approve: That person becomes a member of the group.
- Approve all: Approves everyone waiting for approval at once.
- Decline: Turns the request down. If requests keep being declined, the person can no longer apply. "Allow to apply again" on the members screen puts them back in a state where they can apply.
If you set the approval method to "Approve all requests automatically," a person who applies becomes a member right away. This saves the work of approving, but anyone who knows the invite link can join.
Create one "event" for each practice day
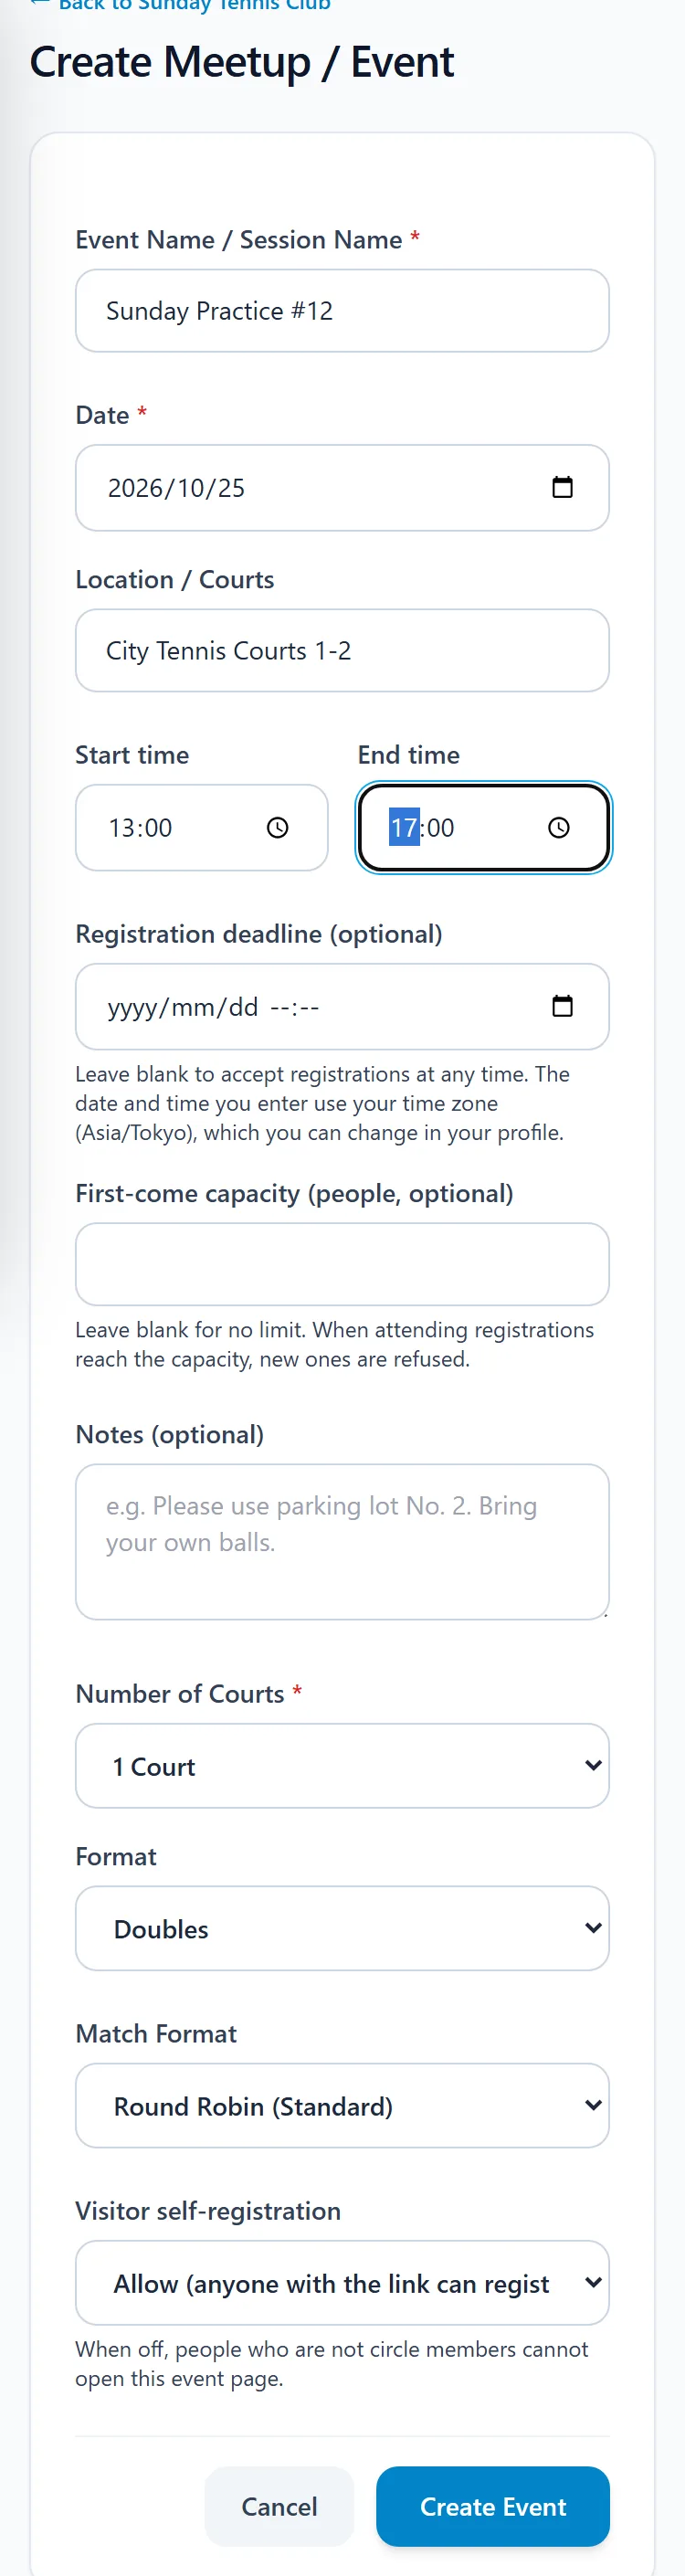
Create an event with "Create Event" on the group screen. If you choose a date on the calendar, a "Create Event" button appears in that day's cell. Tap it to start with the date already filled in (it does not appear for past dates). The items to enter are as follows.
- Event name and date (required), location, and start and end times. If you enter a start time while the end time is empty, the end time is filled in automatically as 2 hours later (an end time that is already filled in does not change).
- Number of courts (required): This becomes the number of courts when you create the draw.
- Format (doubles or singles) and match format
- Visitor self-registration: If you choose "Allow," anyone with the URL can register their own attendance. If you choose "Do not allow," only group members can open this event, and an organizer or co-organizer registers the visitors.
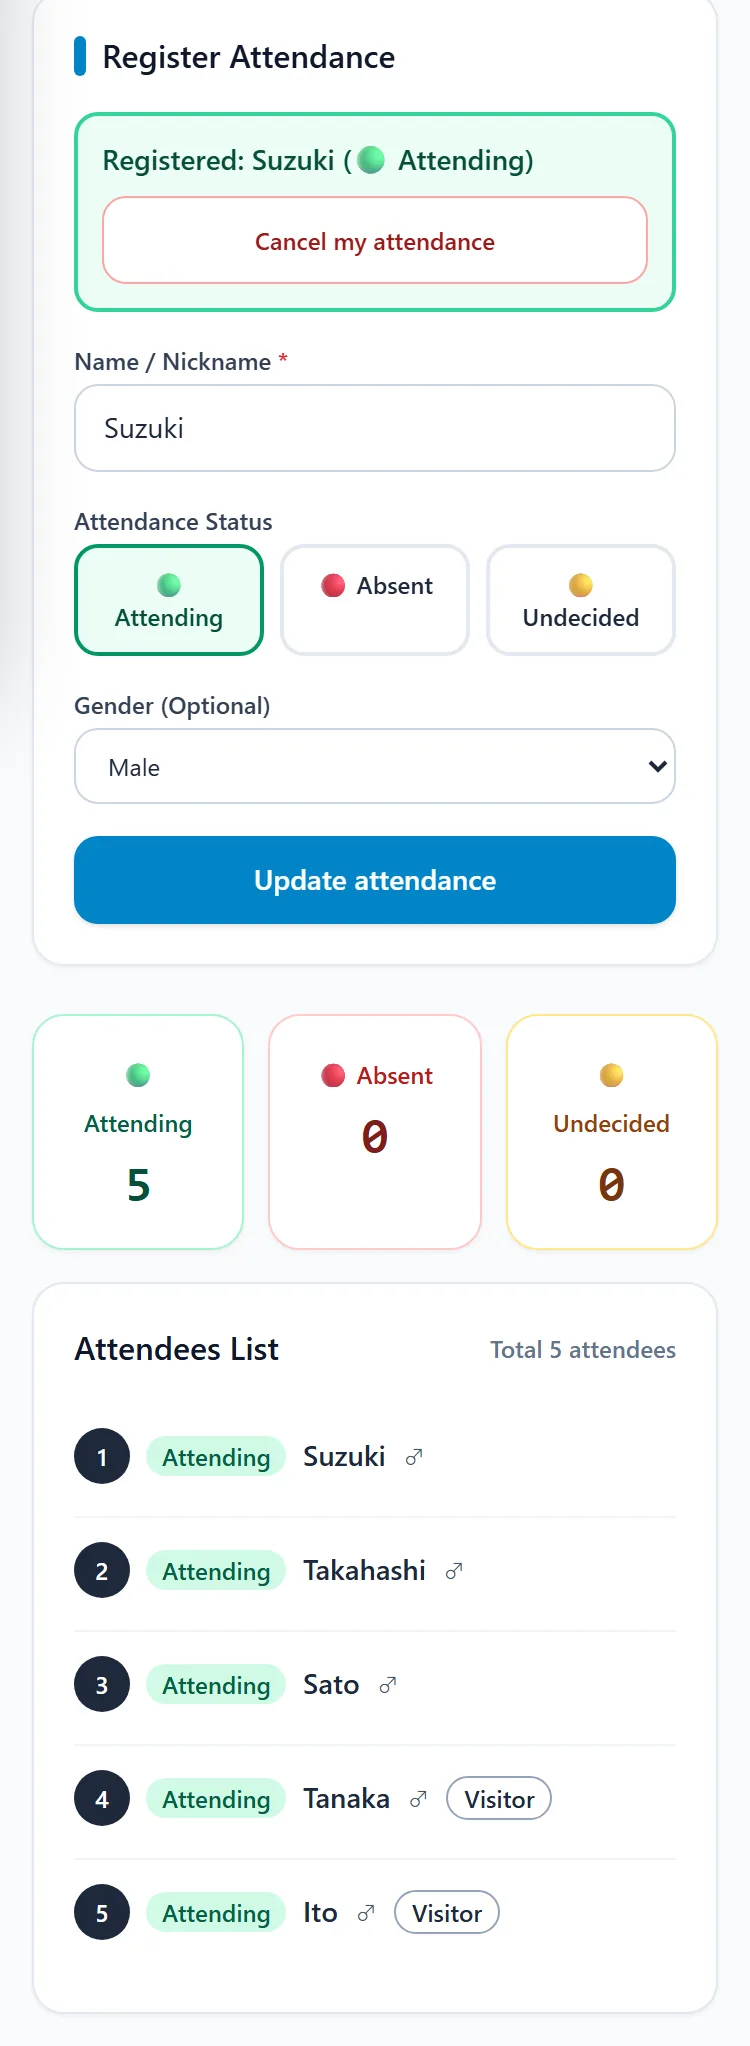
Members enter their own attendance. The organizer can add visitors
The event screen has a "Register Attendance" section. A member enters a name (nickname), chooses "Attending," "Absent," or "Undecided," and taps "Submit Attendance." After sending, they can update or cancel their attendance on the same screen.
To ask for attendance, tap "Copy invitation text & URL" to copy the event's URL and invitation text, and paste them into a chat.
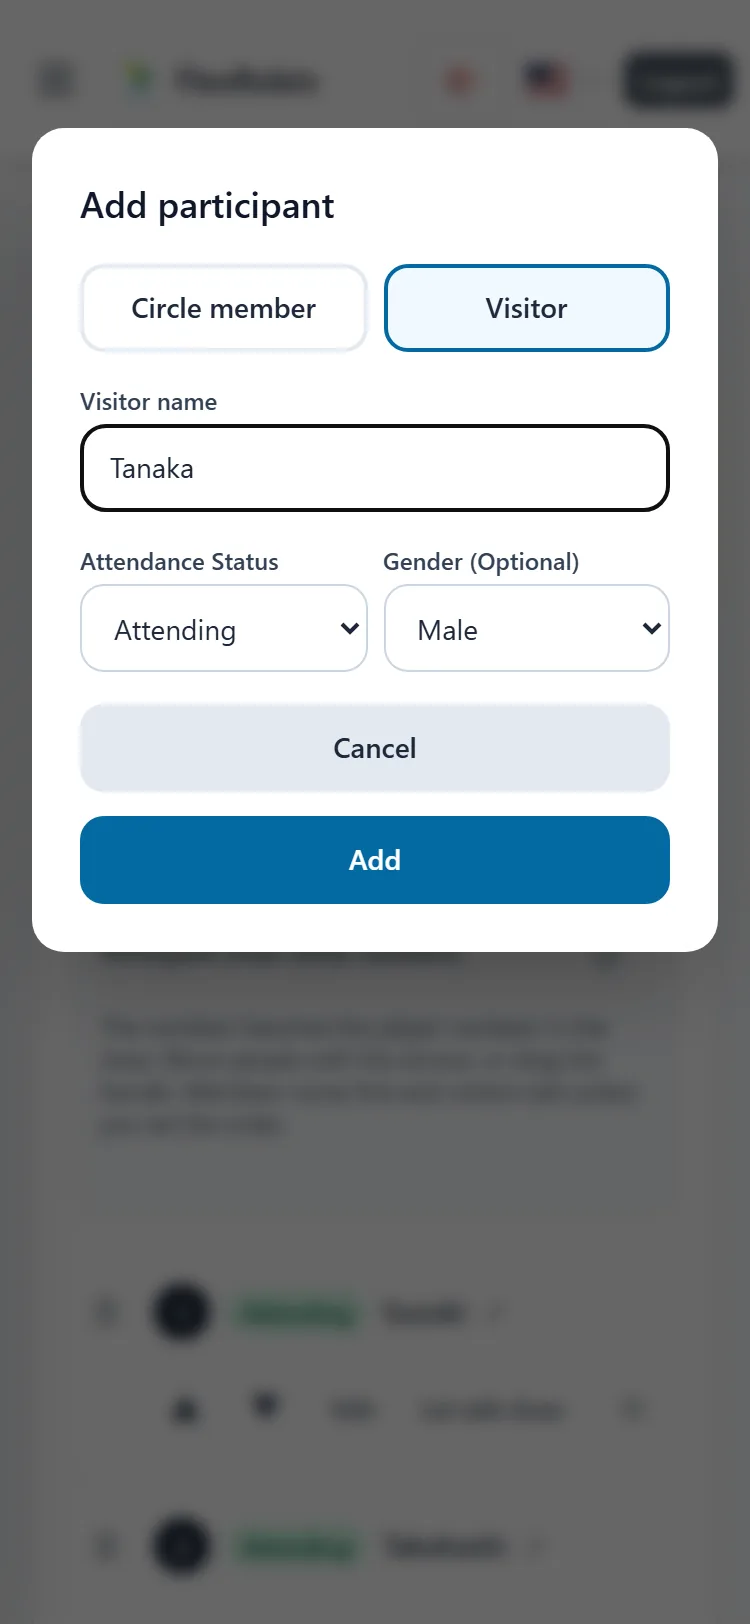
For visitors, or members who cannot enter their own, the organizer (or a co-organizer) adds them with "Add participant" on the event screen. Choose "Circle member" or "Visitor," enter the name, and tap "Add."
Once attendance is in, tap "Create Draw from Attendees"
The organizer's screen lists the buttons for working with the event. If there are too few people marked "Attending" for the number of courts, it shows "N more needed," and you cannot create the draw. For one court of doubles, you need 4 people.
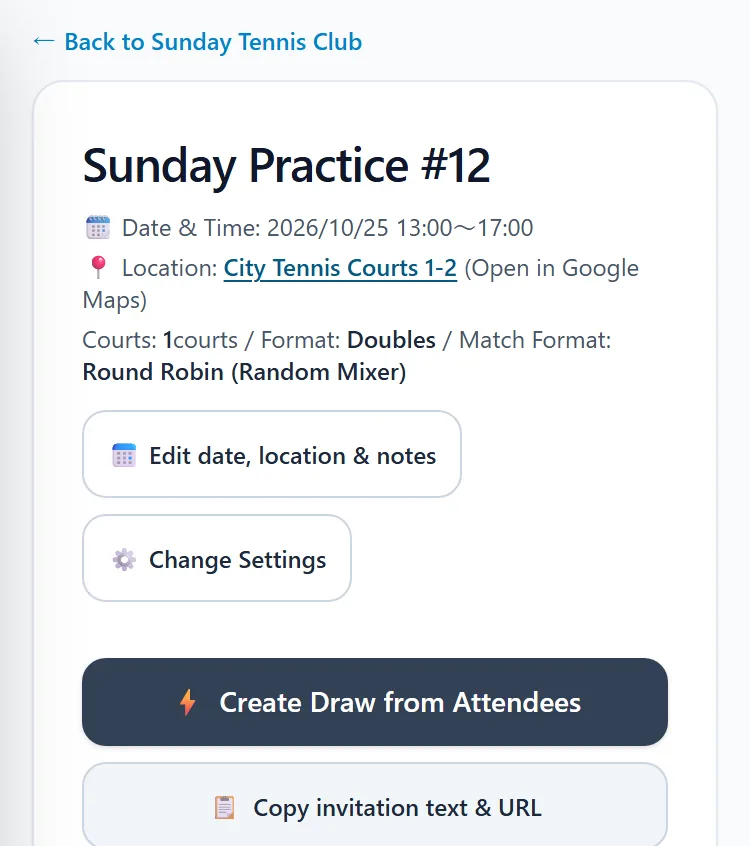
- Tap "Create Draw from Attendees."
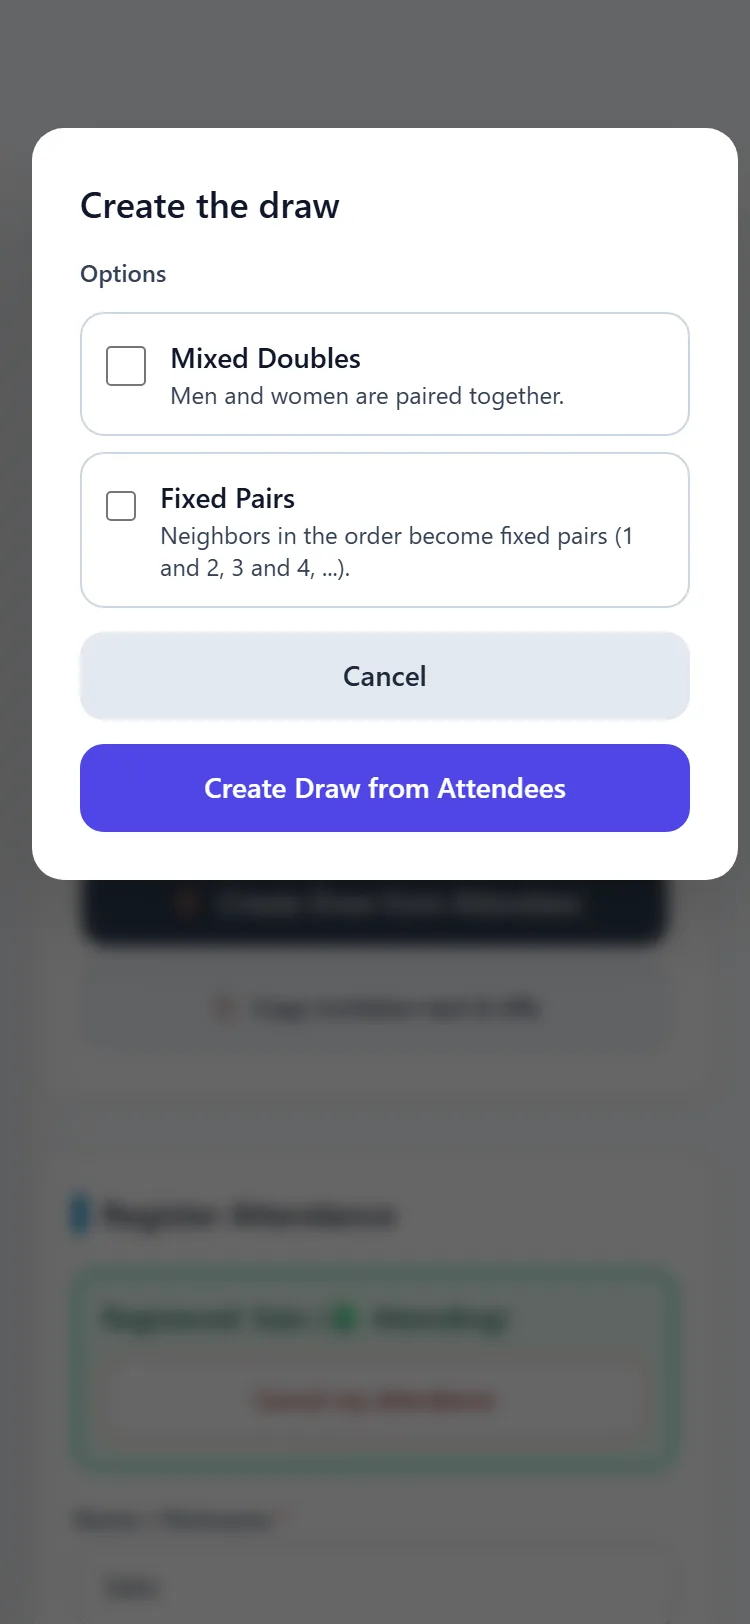
- The Mixed Doubles and Fixed Pairs options appear. Check only the ones you use.
- Tap "Create Draw from Attendees" again.
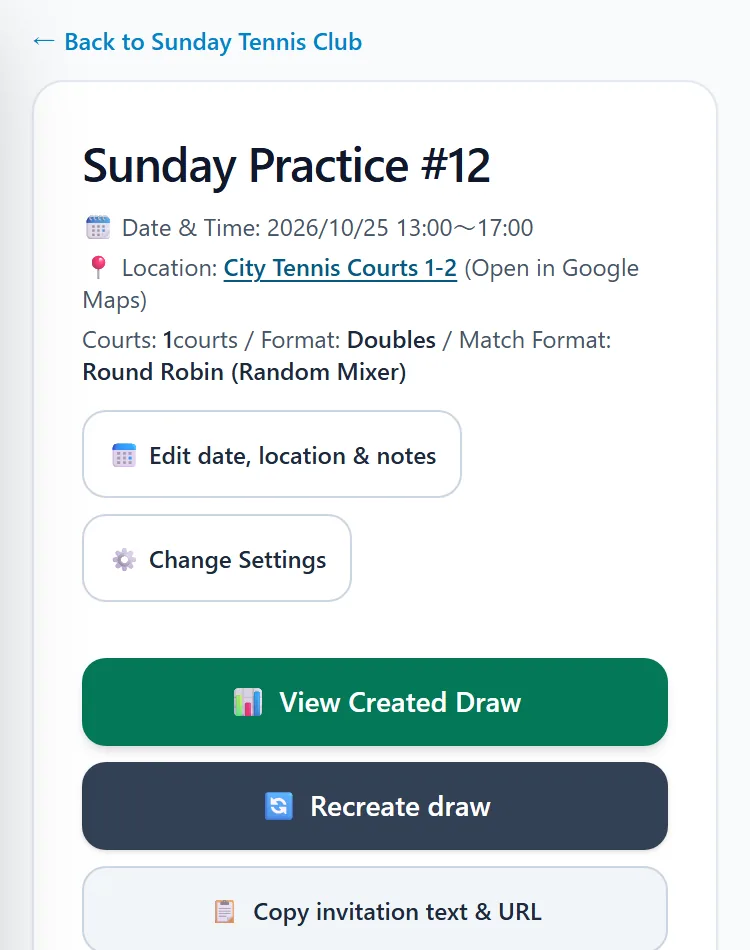
The draw you create opens on the same screen as an ordinary draw. Entering scores and reading the results work the same way as in "Creating your first draw." The event screen now shows "View Created Draw."
- Order: The order of the participants becomes the player numbers in the draw as it is. If you do not reorder them, members come first and visitors last. With Fixed Pairs, the two people next to each other in the order become a pair (1 and 2, 3 and 4, and so on).
- Recreate draw: Use this when attendance changes. A new draw is created from the current attendance, and the event's link switches to the new draw. Scores entered in the old draw stay in the old draw and are not carried over to the new one.
You cannot choose Mixed Doubles unless you have the required number of both men and women. You can choose Fixed Pairs only when the number of participants is even. When you cannot choose an option, the screen shows the reason.
Participation stats show each member's attendance rate
In "Participation stats" on the group screen ("Stats" on the members screen), you can choose a period and see the number of events held, total attendances, and the average number of people per event. Below that, each member's attendance rate is listed.
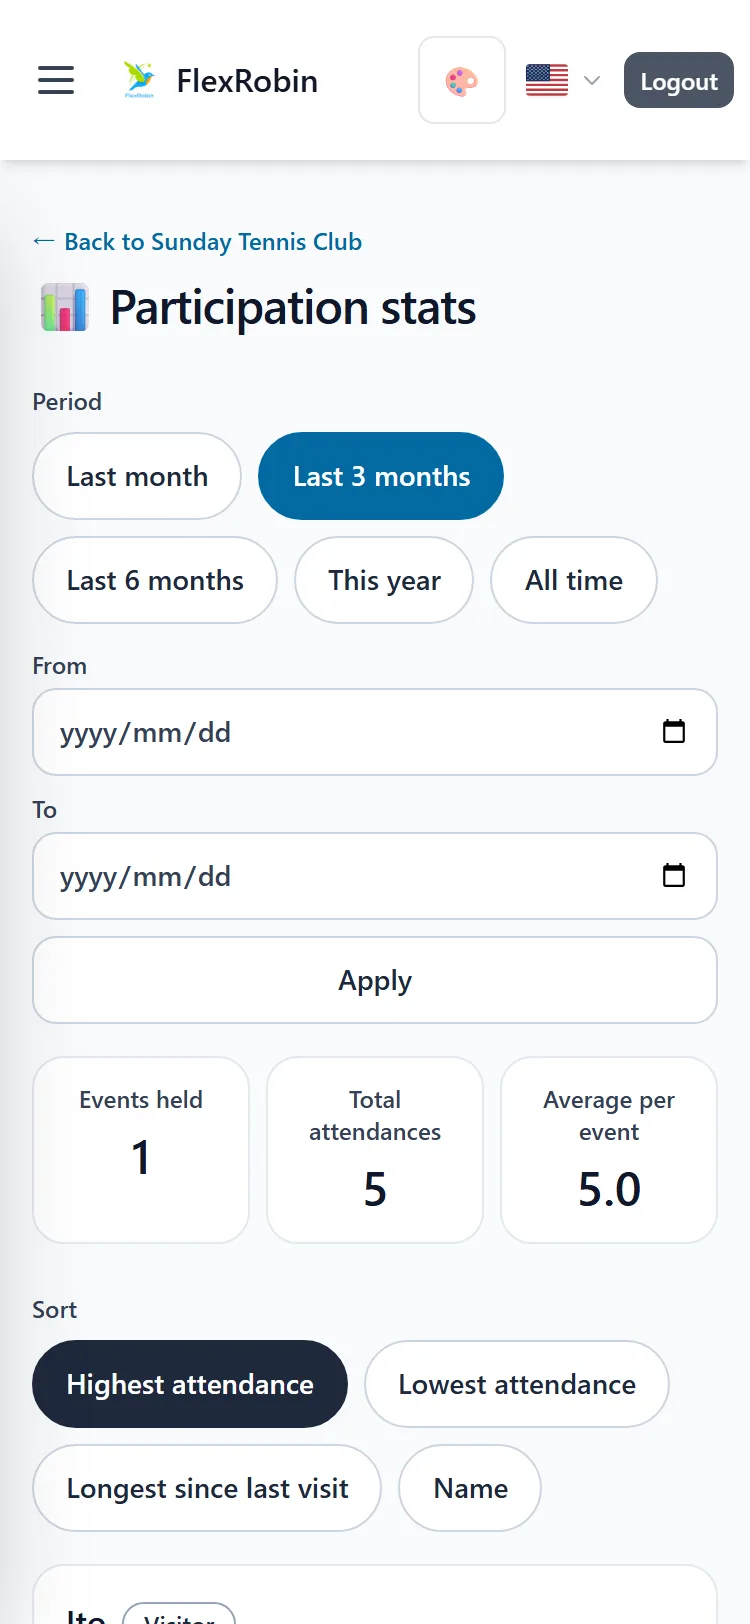
- Period: Choose from the last 1 month, 3 months, 6 months, this year, or all time, or enter a start date and an end date.
- Sort: Choose from highest attendance rate, lowest attendance rate, longest since last attendance, or by name.
- Worth reaching out: A mark placed on members you may want to get in touch with.
Only events that have already taken place are counted. Upcoming events are not included.
To hand over the organizer role or remove a member, use the members screen
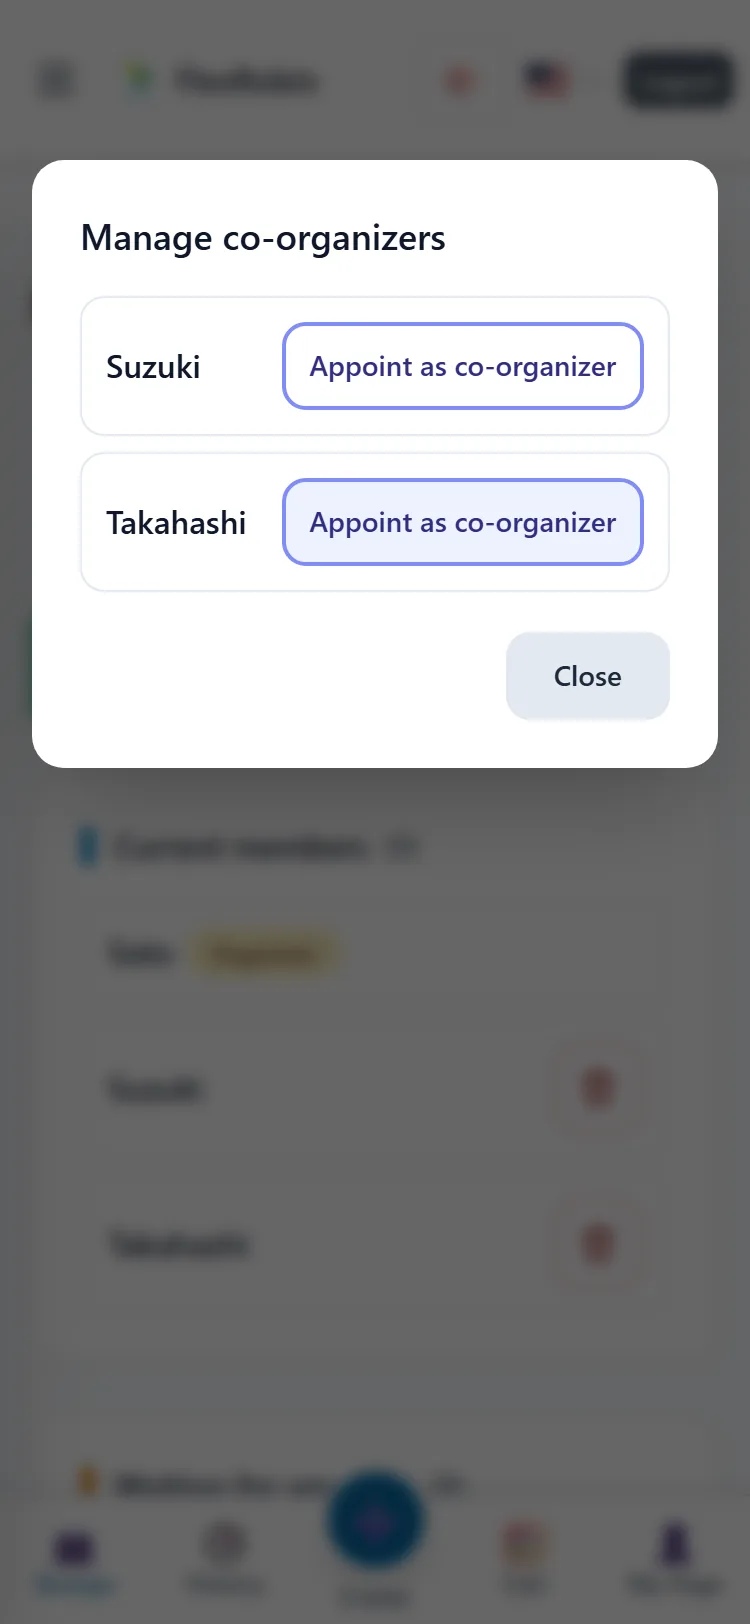
- Co-organizer: A role that helps the organizer. When the organizer taps "Manage co-organizers" on the members screen and appoints someone from the list, that person can approve requests just like the organizer. You can also remove the role on the same screen.
- Handing over the organizer role: From the same "Manage co-organizers" screen, you make another member the organizer. You become a co-organizer.
- Removing a member: Tap the trash button at the right end of the member's row. This removes the member from the group. If you choose to block, the person cannot apply again until you allow it.
- Leaving the group: You can leave on your own. After you leave, you can no longer see the group's events. If you have the invite link, you can apply again.
In "Group settings," you can change the group name and the approval method. If you delete a group, the group and its events can no longer be seen, but draws already created remain. You can also delete just an event.
Free, no sign-up, works in your browser
Read next
- Creating your first draw — Entering scores and reading results once the draw is made
- Sharing with everyone — Show the draw with a URL and a QR code
- Handy tools — The bill calculator, history, and templates